Showing posts with label garment care. Show all posts

Monday, February 1, 2010

Vintage Plaid Day Dress


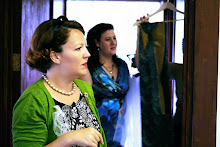
I recently purchased this adorable vintage brown/green/blue cotton plaid dress from Swift Vintage (blog here and awesome etsy shop here). The dress fit me very nicely (I kind of have a "vintage" body type and seem to do well with 1950's/early 1960's stuff). I was, however, feeling a little bit... matronly... in it given that it is so dark in color and has a conservative neckline. So I decided that a bit of hemming was in order. I cropped it to just above the knee and was happy with the results.

The angle of the picture isn't terribly flattering, but it gives the idea. This was just the little alteration that this dress needed to feel a little more up-to-date and flirty and more appropriate for evening. Although you can't see it in the picture, I have decided that I like to wear my belts backward to add a little interest to the back of the dress. Maybe I'm crazy, but I like the look. I love this dress so much and have worn it twice already!

I try to adhere to the principle of "waste not, want not", so I'm holding onto the extra fabric. I think there is just enough to make a cute little vintage inspired baby girl dress like this one:


Friday, January 15, 2010

Project Trench Coat

Sometimes you lose a button in a busy place and you don't have any idea where you placed the little plastic baggie with the extra button that came with your garment when you bought it. (Exhibit A, missing button on left side of jacket, lost at a bowling alley during a holiday party).

But you don't despair because you know that you can solve your problem and dress up your plain garment with some cool new buttons for just a little time and effort and not much cash. (Exhibit B: square tiger-stripe amber, silvery and black buttons purchased for $1 each at Michael Levine's in downtown LA's garment district).


And the result is a slightly dressed-up, improved version of the original (Exhibit C). I ended up going a little more subtle than I had originally planned, but I feel like the result is polished but still interesting. I feel just a little cooler wearing my black Target trench now.
Of course, I could have avoided all this effort if I had just reinforced the buttons when I first bought the jacket, but I'm rarely that motivated. Also, while I was putting away the extra new buttons that I bought, I found the original manufacturer-provided extra button in my button stash (turns out I occasionally put things where they belong). But I'm OK with that, I like the new buttons much better.

Wednesday, January 13, 2010

"I don't even know how to sew on a button!"


When I tell people that I sew, one of the most common responses is, "I don't even know how to sew on a button!" There are a some practical life skills I think should be taught to everyone in school that get sadly overlooked by many... how to type, how to balance your checkbook, and how to sew on a button are just a few. Through the power of the internet, you can now learn this handy little life skill and will no longer need to call on mom or shell out money to a dry cleaner to get buttons replaced. Also, replacing boring buttons with buttons that are whimsical, colorful, or elegant can breathe new life into a garment and make it look couture and one-of-a-kind. They are like jewelry for you garment. And no one will ever guess you bought it at Target.

Here's one video that shows how to sew on a typical four-hole button. The video moves a bit fast, so pause it as needed. They have tried to make it a bit hip and fun by adding music and amusing titles.


And here's one that demonstrates sewing a shank button. It is a little slower moving, and very thorough and informative.


Happy button sewing!

(stay tuned for the results of my own missing button project!)

Sunday, November 22, 2009

They're called "aglets"


Those little metal or plastic tips on the ends of your shoelaces... and I need to find two and an applicator ASAP.

Thursday, September 17, 2009

The De-wrinkling Cheat

If you're like me, you love ironing as much as the lady in this picture. Hauling out the board and finding space to set up and a place to set the iron without fear of melting something nearby are all a big pain. I have found a cheat that will help you come pretty close to an ironed look that is infinitely easier and less time and space consuming.

It is ideal to do this the night before you need to wear something, but if that's not an option you'll want to give yourself as much lead time as possible. (I want to add a disclaimer here: this technique is not advisable for garments you will wear to really important events like weddings, funerals, and job interviews. Those occasions deserve proper ironing respect.) Do not use this technique on a garment that will be shrunk, spotted, or otherwise ruined by water. If in doubt, put a small bit of water in an inconspicuous place (like inside the hem or at the bottom of the placket) and let dry thoroughly to see the result.

First, hang your garment. If it is a shirt, hang it carefully and button the front. Make sure it is hanging symmetrically. If it is knit, make sure your hanger won't cause "hanger bumps" on the shoulders or arms. If it is a skirt, hang it from a clip hanger by the waist. If it is a pair of trousers, hang them with a clip hanger upside down by the hems, inseams together (like you're making a sandwich... outseam, inseam, inseam, outseam), the clips gripping the center backs and center fronts of the legs.

Second, grab a clean spray bottle that has a mist setting and fill it with clean water. This would be a bad time to spray oily or chemically stuff onto your clothes, so I don't recommend reusing an old cleaning spray bottle.

Now begin spritzing your garment. I usually put my hand inside the garment to add some tension which helps to smooth the wrinkles and spray from the top down. You'll end up getting the garment damp, but it shouldn't be anywhere near dripping. Put a towel down to catch the mist that will fall to the floor.

Last, smooth or pull out any stubborn wrinkles, using more water if necessary and allow the garment to air dry undisturbed.

It's not as crisp as ironing, but considering that you're going to get wrinkled in the car anyway, it's a good second choice!

Sunday, August 16, 2009

Pass the vodka, sweetie dahling....


...and pass on the Febreeze.

Our sweat and our skin have naturally occurring bacteria that discolor and deteriorate fibers and leave odors behind. This is totally normal, it does not mean that you are gross or don't shower enough! :) Even laundering and dry-cleaning those valuable delicate items like silk blouses and formal gowns will not kill these bacteria. This is the cause of discolored underarms in many vintage pieces.

Fortunately, there is a quick, easy, cheap, all-natural solution for this problem... VODKA! (As if we needed another reason to love it) Just put some bottom-shelf vodka (really, the cheaper and higher proof, the better!) in a spray bottle and spritz the areas that come in closest contact with your skin and sweat (like bodices and underarms). You don't have to douse the garment, but be liberal. Vodka's near odorless scent will dissipate quickly, so you won't smell like you spent the night in a distillery and the high alcohol content will kill off those little bugs that want to eat away at your special clothing. The sooner you get to the garment, the better, so be sure to spritz before you drop in the hamper, hang it in the closet, or send it to the cleaners. No need to spend your hard-earned money on the scary chemicals and wasteful packaging of commercial fabric deodorizers. Now you can spend that money you saved on the good stuff to make your favorite martini!

(the photo is from Britain's classic vodka-soaked show Absolutely Fabulous).